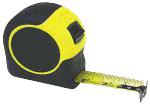
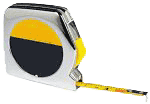
| General Awning Measuring and Mounting Information There are four different places on a home or building where retractable awnings can be installed: on the wall (the most common place), on the roof, on a soffit or eave, and on the fascia. All these mounting locations have specific requirements, but there are general items to look for to determine the mounting location and positioning for motors or hand cranks.
When trying to find the appropriate location to mount a retractable awning, consider:
- Mount the awning at least 7'6" up from the ground, depending on projection.
- When determining the height to mount retractable awnings, also consider the pitch of the awning; this is how low the front end of the awning drops. For maximum strength, the awning drops 3" per foot of projection, so a 10’ projection awning should hang a minimum of 30" lower in the front than the mount point. The pitch can be adjusted with the crank handle.
- If the retractable awning has an awning hood, allow an extra 2" in clearance for the height of the awning.
- If the retractable awning is mounted over a swinging door, such as a storm door or French door, mount the awning at least 10" above the doorframe so that the door has clearance to open.
- For low clearances or difficult mounting locations, mount the retractable awning to the ceiling, an overhang like an eave or soffit, or the roof instead of the wall.
- Measure the area of the projection, the length that the awning extends. This area must be unobstructed for the awning to extend properly.
When actually installing retractable awnings, do two things:
- Screw the fasteners into a structural component, such as a stud, beam, concrete, or brick.
- Make sure that each fastener is inserted a minimum of 2 ½" into the structural component.
SunSurrender II retractable awnings can be either motorized or manual. For motorized retractable awnings:
- Identify where the nearest electrical outlet is, and measure the distance from the mount point to the outlet. This gives the length for the electrical cable to use for the motor.
- If accessories like a switch or wind sensor will be used, measure the distance from the awning location to the sensor or switch location. This gives the cable lengths required to connect the awning to the switch or sensor.
- If a switch or wind sensor will be used, measure the distance from the sensor or switch to the nearest electrical outlet. Again, this gives the cable length necessary to connect the sensor or switch to power.
- Determine what side of the awning to install the motor on. Since the motor is enclosed in the retractable awning roller tube, this only affects what side the electrical cable is on, whichever is closer to a power source.
For a crank-operated (manual) retractable awning or for a manual override:
- Decide which side, left or right, the crank should be installed on. Make sure that the range of motion is unobstructed and that the area is easy to access.
- Measure approximately how long the crank handle needs to be by measuring from the mount point to about waist-high. The crank handle comes in four lengths, 43", 59", 70", and 90".
Retractable Awnings - Wall Mount
The most common location to install retractable awnings and patio covers is directly to an exterior wall.
- The wall area must be smooth and level for the entire width of the retractable awning; there cannot be any other objects projecting from the wall, like security lights, speakers, air vents, gutters, or building trim.
- The retractable awning frame and hardware is 9" tall, so the installation area must have at least 9" of unobstructed space the entire width of the awning.
- If the awning has the optional awning hood, then the height of the frame is 11", and the installation location must have at least 11" of clear space.
- The total width of the awning includes the length of the roller tube plus the size of the wall mount brackets.
- The number of mounting brackets required depends on the width of the awning.
It is possible to mount the awning directly to siding. For horizontal lap siding, first install a long board of pressure-treated lumber to keep the mounting brackets plumb, and then mount the awning brackets to the board. The board must be:
- At least 2" thick
- The full width of the awning including the mounting brackets
- At least 9" high or at least 11" high with the awning hood
For other types of siding, mount pressure-treated angle wood shims, appropriately spaced and level directly to the siding, then install the retractable awning bracket to the shim.
Roof Mount
Installing retractable awnings on a roof requires special triangular brackets that follow the slope of the roof.
- BudgetAwnings.com’s roof mount brackets are adjustable so that the exact angle of the bracket can match the angle of the roofline.
- For shingled roofs, the roof mounting brackets can be installed directly through the roofing shingles into the truss.
- For barrel or concrete tile roofs, remove the tiles where the brackets will be installed, then replace the tiles around the brackets after the retractable awning is installed.
- Even with roof mount brackets, the retractable awning still needs wall mount brackets to be properly installed. If the awning has the optional hood, then it requires universal mount brackets instead of wall mount brackets.
- The number of mounting brackets required depends on the width of the awning.
Soffit, Overhang, or Eave Mount
Retractable awnings can be installed under and on an existing overhang – such as a soffit or eave – using universal mount brackets. The number of mounting brackets required depends on the width of the awning.
Fascia Mount
The major factor when mounting a retractable awning on the fascia is that the fascia must be strong enough to handle both the full weight of the awning and the pressure the retractable awning puts on the mounting brackets when it is fully extended.
- Mounting retractable awnings on the fascia requires wall brackets.
- If your SunSurrender II retractable awning has the optional awning hood, then mounting it on the fascia requires universal mount brackets.
| Awning Width |
# of Mounting Brackets |
# of Arms |
| 12' |
2 |
2 |
2 |
| 16' |
3 |
2 |
2 |
| 18' |
4 |
2 |
2 |
All SunSurrender II retractable awnings are shipped with complete, detailed installation instructions. For additional assistance with measuring or installing your retractable awning, call us immediately or email; we respond to every support request within 24 hours.
Retractable Awnings - Next
page
|


|